
How to Create Custom Post Types in WordPress
WordPress is a content management system – not just a powerful blogging platform. Creating custom post types in WordPress allows users to leverage the full potential this amazing content management system has to offer.
Custom post types enable users to display just about any kind of content on their website in the most effective way possible. By tweaking your WordPress website, you’ll be able to integrate custom post types and create an engaging browsing experience for your site’s viewership.
With that in mind, in this post, we’ll take a look at what custom post types are and how you can use them. We’ll also walk you through a tutorial of different methods to create custom post types in WordPress.
Let’s put everything into context before we move on.
What Are Custom Post Types?
Custom post types are simply posts that have different parameters governing their layout. They allow webmasters to display their content in a more structured manner. By default, WordPress ships with the following post types:
- Posts
- Pages
- Navigation menu
- Attachments
- Revisions
Regular posts enable webmasters to define different parameters – categories, tags, and authors. With custom post types, you can configure additional parameters that are unique to your site. For instance, if you wanted to create a coupons section to your website. By creating a custom post type for it, you’d be able to add a coupon title, percentage of section, coupon code, and possibly a classifier.
Useful Plugins
If you’re not particularly technically minded then the simple way to create custom post types is to use a plugin.
1. Custom Post Type UI
Custom Post Type UI is a lightweight plugin for WordPress that enables users to easily create custom post types. This popular plugin features an intuitive user interface which allows users to create and manage both custom post types and taxonomies for their WordPress site. What this plugin does is it creates the custom post types for you and you have to add them to your active theme yourself. With Custom Post Type UI Extended, you can also display the custom post type content on your website.
2. Toolset Types

Toolset Types is a complete toolkit for creating and managing custom post types, custom fields, and custom taxonomies in WordPress.This one of a kind plugin allows webmasters to modify their WordPress admin panel to create a fully customized content management system that is ideal for their business needs.
One of the best features about this powerful plugin is that it’s easy to use for both web developers and non-coders alike. Here’s a great post that goes in-depth about ToolSet plugin.
3. WCK – Custom Fields and Custom Post Types Creator
WCK is a flexible custom post types generator plugin that allows webmasters to create custom post types, custom fields, and custom taxonomies without having to code. The plugin features an intuitive and easy to use interface that lets you modify the arguments for different functions. Users can create and customize their custom post types from within the admin panel and leverage advanced labeling functionality.
Plugins offer an easy way to create custom post types in WordPress. All you have to do is fill out the relevant information and voila! You’ll have a custom post type set up in minutes. Though this is the easier way to get the job done, some webmasters still prefer not to install a plugin for features that they can easily code into their site.
Manually Creating Custom Post Types
One of the major problems with using a plugin is that if you deactivate the plugin the custom post types will no longer be visible on your WordPress website. Those of you who are technically minded and would prefer to manually create custom post types can follow these simple steps.
The Simple Method
Navigate to your site’s functions.php file by logging into the FTP client.
Add the following lines of code to the functions.php file:
//To create custom post types
 function create_customposttype() {
 register_post_type( 'deals',
 //Setting custom post type arguments
 array(
 'labels' => array(
 'name' => __( 'Deals' ),
 'singular_name' => __( 'Deal' )
 ),
 'public' => true,
 'has_archive' => true,
 'rewrite' => array('slug' => 'deals'),
 )
 );
 }
 add_action( 'init', 'create_customposttype' );
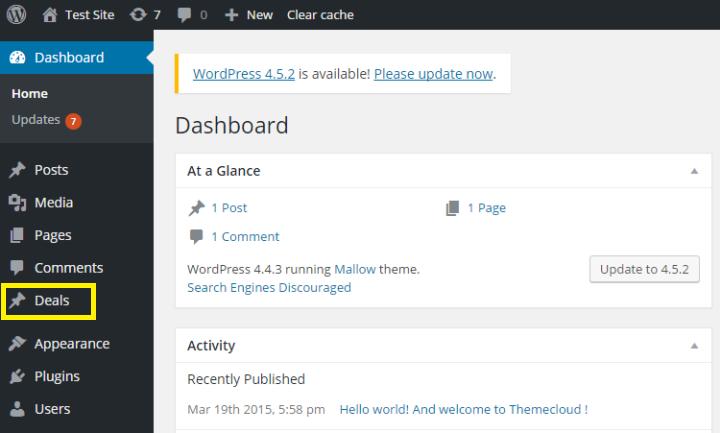
The code given above works by registering a new custom post type on your WordPress website called ‘deals’. Next, it defines a set of arguments for this new custom post type by setting the label, visibility, archive mode, and slug. By adding this chunk of code to your site’s functions.php file, you’ll have added a new Deals custom post type.
The Advanced Method
The real reason behind delving into code is to gain finer control over the structure of your custom post types and perhaps be able to set more arguments. If you’re fine with the basic custom post type structure then you’re good to go with the code given above and you can skip down to the displaying custom post types section. On the other hand, those of you who are looking for more flexible options can add this code to their site’s functions.php file:
Note: We’ll be working to modify our Mallow theme. If you’re using another theme then make the necessary alterations as you go along.
//Creating a custom post type with more options

function create_customposttype() {

//Setting arguments

$labels = array(
 'name' => _x( 'Deals', 'Post Type General Name', 'mallow' ),
 'singular_name' => _x( 'Deal', 'Post Type Singular Name', 'mallow' ),
 'menu_name' => __( 'Deals', 'mallow' ),
 'parent_item_colon' => __( 'Deals Movie', 'mallow' ),
 'all_items' => __( 'All Deals', 'mallow' ),
 'view_item' => __( 'View Deal', 'mallow' ),
 'add_new_item' => __( 'Add New Deal', 'mallow' ),
 'add_new' => __( 'Add New', 'mallow' ),
 'edit_item' => __( 'Edit Deal', 'mallow' ),
 'update_item' => __( 'Update Deal', 'mallow' ),
 'search_items' => __( 'Search Deal', 'mallow' ),
 'not_found' => __( 'Not Found', 'mallow' ),
 'not_found_in_trash' => __( 'Not found in Trash', 'mallow' ),
 );

//Setting additional options

$args = array(
 'label' => __( 'deals', 'mallow' ),
 'description' => __( 'Deals and Coupons', 'mallow' ),
 'labels' => $labels,
 //Set the features the custom post type will allow in the post editor
 'supports' => array( 'title', 'editor', 'excerpt', 'thumbnail', 'revisions', 'custom-fields', ),
 //Setting the taxonomies
 'taxonomies' => array( 'classifier' ),
 /*
 * By setting hierarchical to true, the custom post type will support parent and child elements.
 * hierarchical = false means the custom post type will not support parent and child elements.
 */
 'hierarchical' => true,
 'public' => true,
 'show_ui' => true,
 'show_in_menu' => true,
 'show_in_nav_menus' => true,
 'show_in_admin_bar' => true,
 'menu_position' => 4,
 'can_export' => true,
 'has_archive' => true,
 'exclude_from_search' => false,
 'publicly_queryable' => true,
 'capability_type' => 'page',
 );
 //Registering the custom post type
 register_post_type( 'deals', $args );
 }
 add_action( 'init', 'create_customposttype', 0 );
This allows users to fully customize their custom post type settings by setting the options they’d like to enable and disable for the custom post type. Registering the custom post type is important. If you ignore this step then it’s possible that the custom post type won’t work on your WordPress website.
Displaying Custom Post Types
All that’s left to do now is display the custom post type on your site. To do this, you can use default archive templates, display them in widgets, or on the front page. We’ll explore all three of these methods below.
Default Archive Templates
- Login to your WordPress site’s admin panel.
- From the dashboard, navigate to Appearance > Menus.
- Add a custom link to your site’s menu which goes to the custom post type. It might look something like this: http://www.yoursite.com/deals
- You can replace yoursite.com with the name of your WordPress website and deals with the custom post type that you’ve added in the steps given above.
- Click the Save button to save your changes.
- Navigate back to your site’s front-end and visit the newly added menu item.
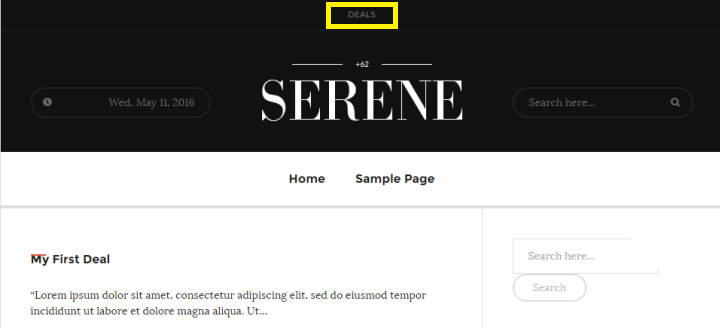
- You’ll notice that the custom post type has been added to your website using your theme’s archive.php template. It should look something like this:
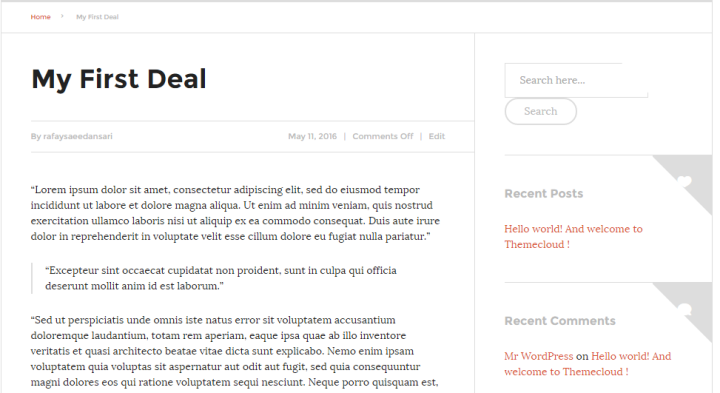
Custom Post Types in Widgets
As most of you already know, WordPress comes with a default widget that displays your recent blog posts. The functionality, however, is limited to blog posts alone. If you want to display custom post types in widgets on your WordPress site, you’ll have to get a little creative. The easiest way to do this is to use a plugin that supports custom post types.

Ultimate Posts Widget is a feature-rich plugin for WordPress that enables webmasters to display custom post types. This flexible solution allows users to personalize their widgets once they’ve displayed them to fit their site’s brand. It comes with a plethora of customization options in addition to hooks, custom templates, and filters.
Whether you’re a professional web developer or not well-acquainted with programming, the Ultimate Posts Widget has something in store for you. Setting up and getting started with the plugin is intuitive and you’ll have your custom post types added to widgets in no time.
Custom Post Types on the Front Page
Custom post types are often created to create a separate series that doesn’t coincide with your regular blog posts. That said, if you’d like to display the custom post types alongside the other blog posts then all you have to do is add the code given below to your WordPress site’s functions.php file.
function add_my_post_types_to_query( $query ) {
 if ( is_home() && $query->is_main_query() )
 $query->set( 'post_type', array( 'post', 'deals' ) );
 return $query;
 }

add_action( 'pre_get_posts', 'add_my_post_types_to_query' );
This code is inline with the example we’ve been working on throughout this tutorial. If you’re adding a custom post type different from deals then remember to replace deals with the name of your custom post type.
Wrapping It Up
Custom post types are powerful and flexible alternatives to tweaking regular blog posts to display custom content. Once you get the hang of it, you’ll find that custom post types are actually pretty fun and there’s a ton of things you can do with them.
We walked you through a tutorial on how to create custom post types in WordPress and then display them on your site. We encourage you to try it out on your own – whether you use a plugin or the code – and experiment with more advanced custom post type modifications.
Do you use custom post types on your WordPress site? Were you able to configure your custom post types to display custom content the way you wanted? We’d love to hear all about your experience so get in touch by commenting below!

What this plugin does is it creates the custom post types for you and you have to add them to your active theme yourself.
Need help with academic essay writing? Check this killerpapers.org reviews for trustworthy insights. From crafting essays to advanced writing content creation, finding a dependable service can significantly improve your academic results and ease the stress of tight deadlines and complex assignments.